by TheLastWonton | Feb 15, 2011 | Appetizers & Snacks, Beef, Pork & Lamb, Breads & Sandwiches, Breakfast & Brunch, Main Dishes
A BLT elevated to new levels of deliciousness by a renown chef, for a movie chef!
Does it get any better?
An Adam Sandler flick overflowing with lots of quirky characters, superbly portrayed, with some great lines…..a little drama, a little comedy and a big heart. Spanglish is one of those movies that easily won me over and even had a pause, re-wind and play-it-again scene or two.
Like the after-work sandwich scene. Adam's character, a lovable and brilliant chef, comes home after a demanding day at his restaurant to relax with a beer and a late night nosh of chefly proportions.
Enter the Spanglish Sandwich. Mayhaps, sandwich perfection and exactly what we all like to imagine our favorite chefs chowing down on for a bedtime snack. And, better still, something we can all make in our humble home kitchens.
It turns out renown chef Thomas Keller was the culinary advisor for Adam's character for this movie. Yes, THE Thomas Keller, whose famed restaurant The French Laundry in the Napa Valley is considered a landmark and touchstone for fresh California Cuisine. Wow! No wonder some claim this to be the best sandwich in the world.
Here's a great little video of both Thomas Keller and Adam Sandler on the set working through the sandwich.
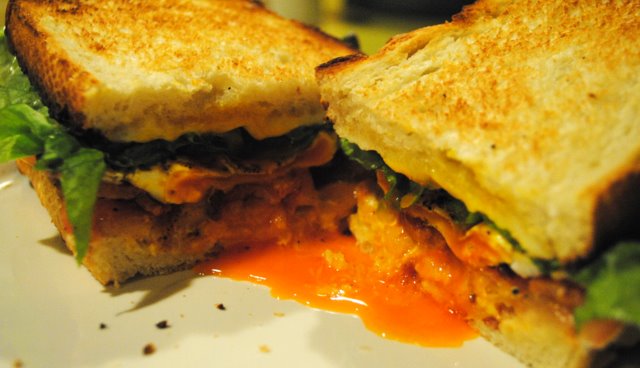
I don't know if I would say it is the 'best' sandwich ever, but man it's good. I have a thing for BLT's anyway, so adding some creamy Monterey Jack cheese and a over-medium egg DEF-FIN-IT-LY worked for me. I'll have to make these again soon so I can ponder once again, if indeed, this is the best sandwich in the world.
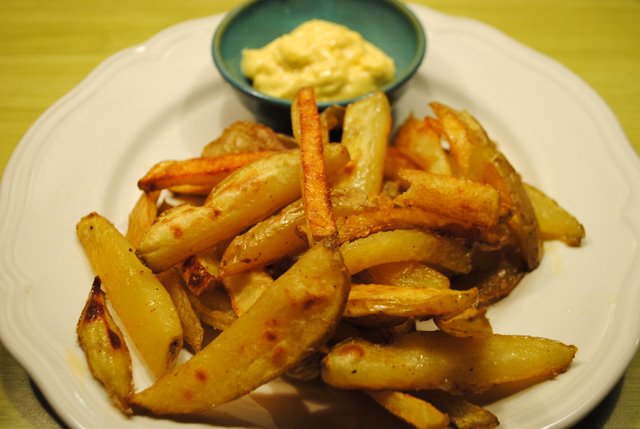
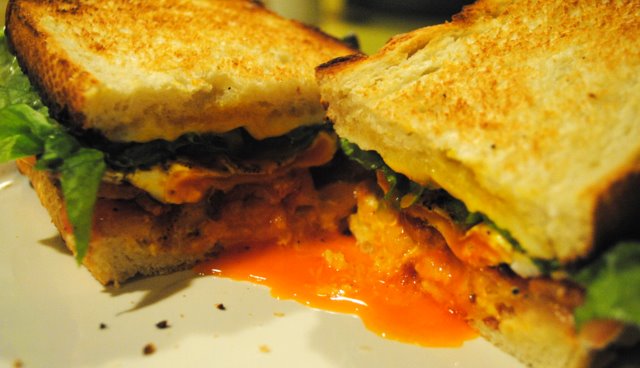
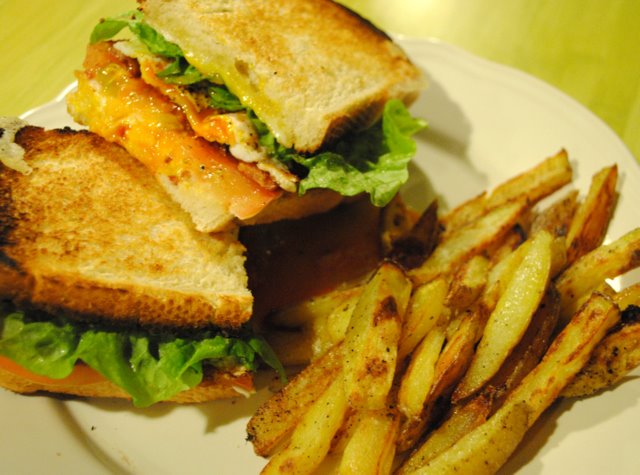
I did up some easy peasy, Yukon Gold Oven Fries with our sandwiches. That worked, because I could dip a few of my fries in the comfortingly familar, rich goodness of the yolk that had escaped the confines of the sandwich. (I hope I didn't make too many of those annoying yum-yum-mmmmm noises when I was eating this.)
I'll have what she's having!
**And now I'm compelled to do something bloggers are NEVER supposed to do. I must apologize for my Spanglish Sandwich photos – I know they're a tich blurry and not as they should be. But, but, but……who, I ask you, who…. could, would, not make haste when THAT sandwich was gorgeously hot and ready and begging to be eaten?!! Who? And then I thought, well I'll just wait to blog it until I make it again and take the time to get some better photos. Nope! I feel I owe it to you all to get the word out there on this sandwich without further ado. Next time I make this I promise to take some photos that will make your mouth water. **
SPANGLISH SANDWICH
For each sandwich:
3-4 thick slices bacon
2 slices Monterey Jack cheese
2 slices rustic country bread or sour dough, toasted (I toasted my sourdough under the broiler)
1 tablespoon mayonnaise
3-4 slices tomato
2 leaves butter lettuce or greenleaf
1 teaspoon butter
1 egg
Salt and freshly ground pepper
Cook bacon until crisp, drain on paper towels, set aside. Place the slices of cheese on one piece of the toasted bread and place in a toaster oven or under the broiler to melt the cheese. Spread the other slice of toast with the mayonnaise and top with the lettuce, sliced tomato (with salt and pepper) and cooked bacon. In a non-stick skillet melt the butter over medium heat. Fry the egg, turning over briefly once the bottom is set and cooked. Keep the yolk runny. Slide the finished egg, into the middle of the sandwich, on top of the bacon. Salt and pepper that glorious mound of goodness and top with the other slice of toast, melted cheese side down. Place the sandwich on a plate and slice in half letting the yolk run down the sandwich. Oh yesss!
EASY OVEN FRIES
Simple, delicious and as good for you as fries can be!
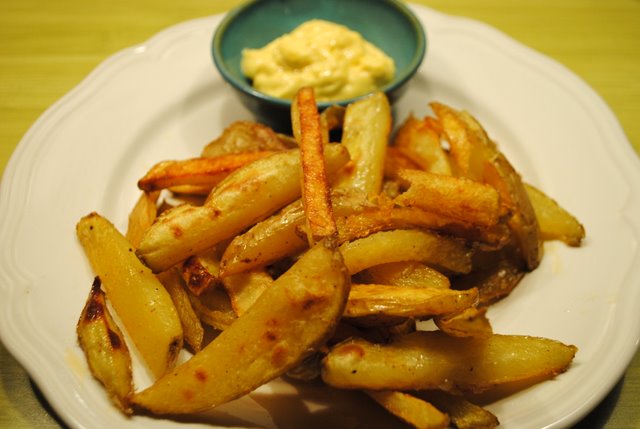
4 medium Yukon gold or other tasty potato, cut into 1/4 to 1/2 inch fries (no need to peel)
Corn, peanut, sunflower or canola oil
Sea or Kosher salt and freshly ground pepper
1-2 tablespoons malt vinegar
Preheat oven to 400F degrees. Soak cut potato 'sticks' in a large bowl of ice cold water for 30 minutes to 3 hours or rinse the sliced potatoes with icy cold water to help remove some of the starch. Drain really well on a clean kitchen towel. Pat dry.
Place potatoes on a large, rimmed baking sheet and drizzle with enough oil to coat lightly. Sprinkle with salt and pepper. Gently massage and toss the potato slices to distribute the oil and seasonings. Arrange in a single layer.
Depending on the thickness of your fries bake 30-40 minutes. When just about cooked, with fries still in the oven, turn on the broiler for the last 3-4 to give the fries a bit of a toasty tan. Watch carefully! Remove from oven, drizzle lightly with malt vinegar and serve hot.
by TheLastWonton | Feb 1, 2011 | Appetizers & Snacks, Baking & Desserts, Cake, Hawaiian, Treats, Uncategorized
MY HAWAIIAN KITCHEN
Delectable memoirs of living on the slopes of Mt. Hualalai high above the famed Kona Coast on the beguiling Big Island of Hawaii.
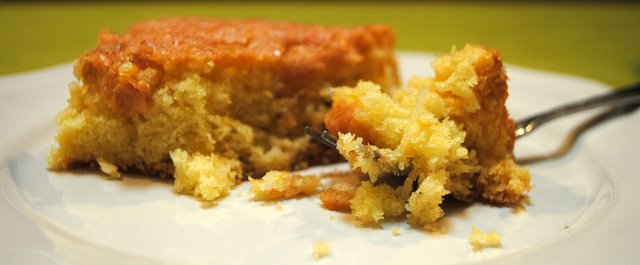
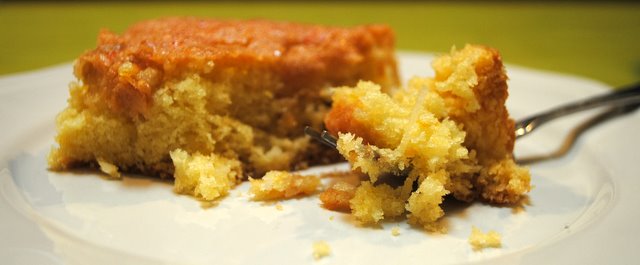
A tried and true recipe from my niece Leanna. Old-fashioned citrus snacking cake goodness that tastes even better the day after you make it and is perfect for beach picnics because it transports easily and is so good chilled.
Dear Journal – Simple abundance. A slow moving Sunday. A perfect spot on the beach at Kua Bay just up a bit from where the sparkling warm, white sands meet the crystal clear aquamarine waves. Beauty. The welcome caress of gentle trade winds. Tropical bliss. A trashy suspense novel to get lost in. A cooler with refreshments to last the day. Contentment. Lilikoi ice tea so cold it’s almost frozen. Big, moist pieces of sweet citrusy cake. Satisfaction. One smiling brunette.
1/2 cup butter
1 cup sugar
1 egg, lightly beaten
1 cup milk with 2 tablespoons vinegar
2 cups flour
2 teaspoons baking powder
1 teaspoon baking soda
Pinch of salt
2/3 cup raisins
2/3 cup toasted walnuts OR shredded sweetened coconut
Grated zest of 1 lemon and 1 orange
2/3 cup sugar
Juice of 1 lemon and 1 orange
Preheat oven to 350F degrees. Grease and flour 9×13-inch cake pan. In medium bowl cream butter and 1 cup sugar with electric mixer. Add egg and milk and vinegar mixture and mix until blended and smooth. Mix in flour, baking powder, baking soda and salt until evenly combined. Stir in raisins, toasted walnuts or coconut and zest. Pour batter into prepared pan. Bake for 30-35 minutes.
While cake is baking combine 2/3 cup sugar and lemon and orange juice. While cake is still very warm poke holes in the top with a chopstick and glaze with sugar citrus mixture. Mmmmm. Good warm, room temperature or chilled. Great the day-after and easy peasy to cut up into a Tupperware container, throw into the cooler and take to the beach. Who said you can’t have your cake and eat it too? Mahalo nui loa Leanna!
HOME
by TheLastWonton | Jan 20, 2011 | Baking & Desserts, Cake, Fruits, Pies, Treats
STICKY, GOOEY, SWEET MOUTHFULS OF WINTER COMFORT
Waaaaaahhhhhh! I wanna' go back…………to Kona!
We're home again, home again, but, but, um, er……I haven't quite climatized yet.
Well jeepers!!! It's snowy, grey and chilly. Brrrrrrrr!
Who wouldn't have problems climatizing?
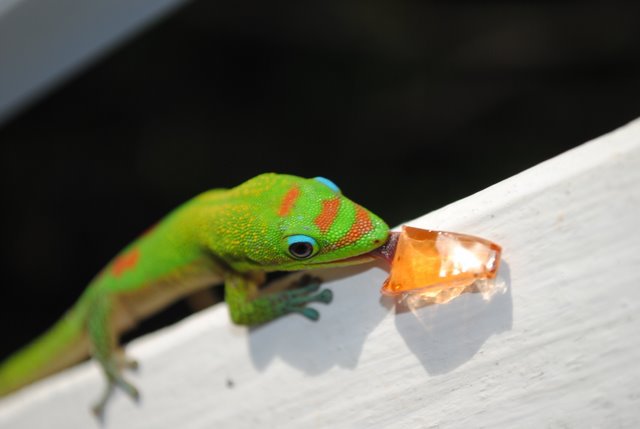
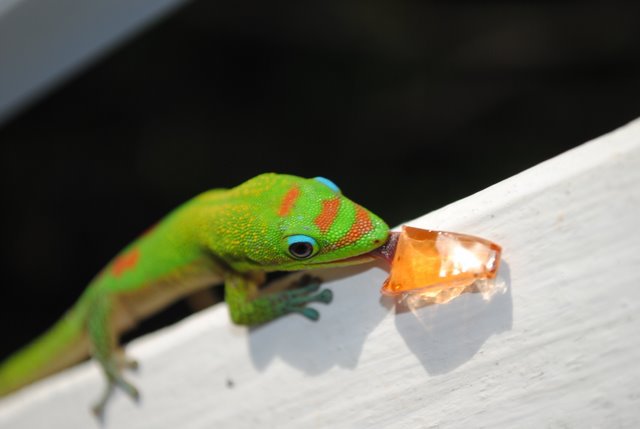
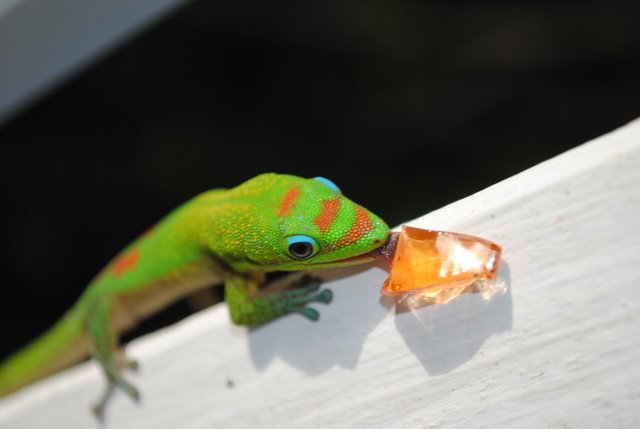
 One week home and I'm still longing for sandy beaches, blossom-scented tropical breezes, beautiful, warm, azure waves (to bob in), sunset Mai Tais, outdoor restaurants with tiki torches and of course settling onto the sun-drenched lanai of our little vacation cottage every morning, with Kona coffee in hand, to make sure the neighborhood geckos have their daily fix of guava jelly.
You might say I'm in the throes of geographical re-adjustment problems……..woe is me!
I need comforting. Or maybe just comfort. Which is precisely what was on my mind when I was trying to figure out what to make for dessert to top off our Turkey Noodle Wonton Soup.
I pondered some of my old stand-bys, but was in the mood to try something new. Something that suited the season, the likes of my dinner guests and the meal itself. Time to surf! Thankfully it didn't take me long to make my way to the The Pioneer Woman food blog (love this blog!) and hit paydirt!
Cherry Cake Pudding is C O M F O R T on a fork. Mark my words (not you Mark!)
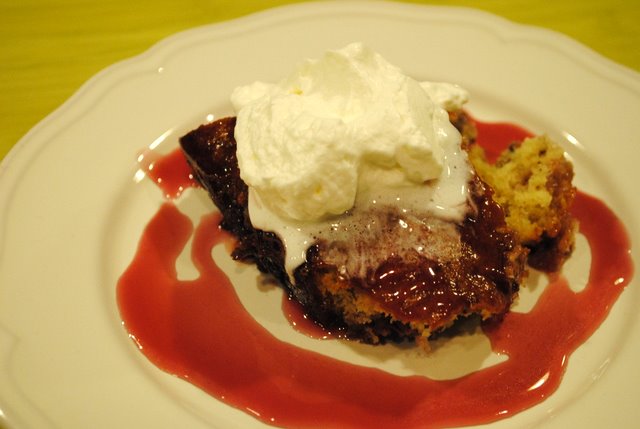
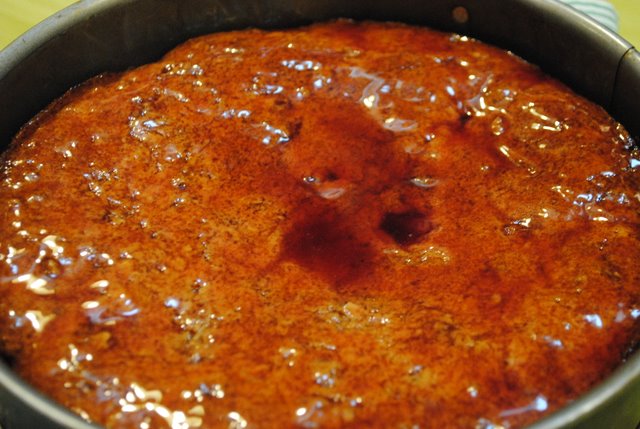
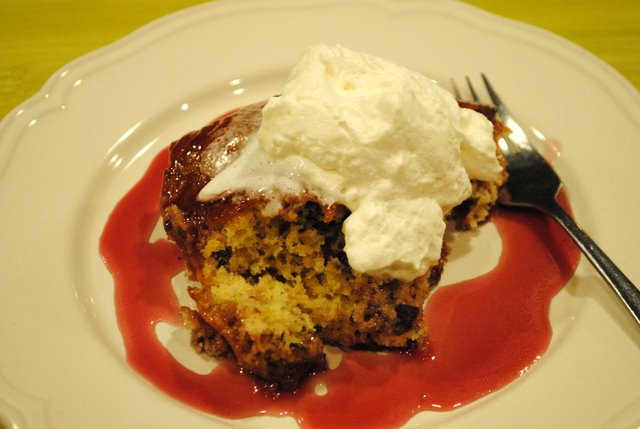
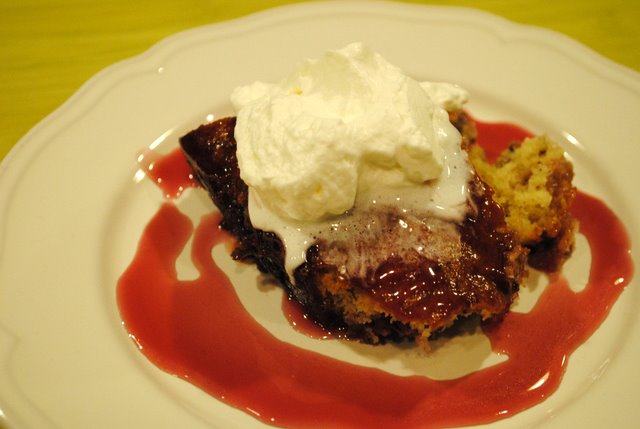
Shining like a candy apple with it's divinely sticky-sweet glaze this dessert shouts of cherriness and has an addictive, almost chewy texture, like a cake crossed with an old-fashioned English pud.
Nothing fancy, nothing complicated, no nifty new flavour combos, just down-home warm mouthfuls of goodness.
And it's easy peasy to make. I used toasted walnuts instead of pecans and canned sour cherries rather than the canned sweet Bing cherries that the Pioneer Woman used, but something tells me that it's not so much about the kind of cherries you use in this cake, just that you do.
So, when the skies are grey and the weather chilly, with a stir here and a beat there, you too can remedy the brrrrrrs with some cheery, cherry, sweet comfort. Thanks Ree!
* * * * * * * * * * * * * * * * * * * * * * * *
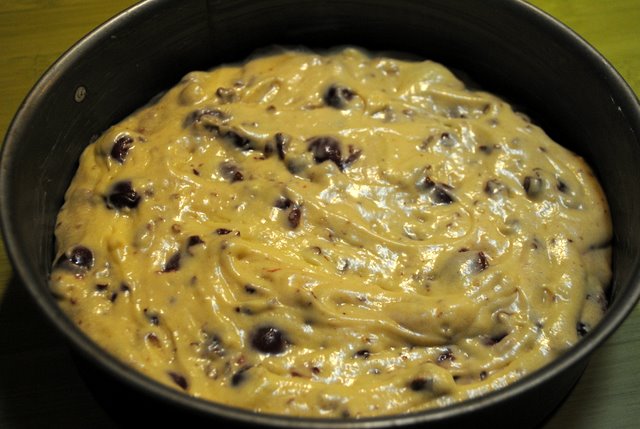
Here we go…………..it's quick and easy to mix up the batter. Then pour into a generously buttered 9-inch springform or cake pan.
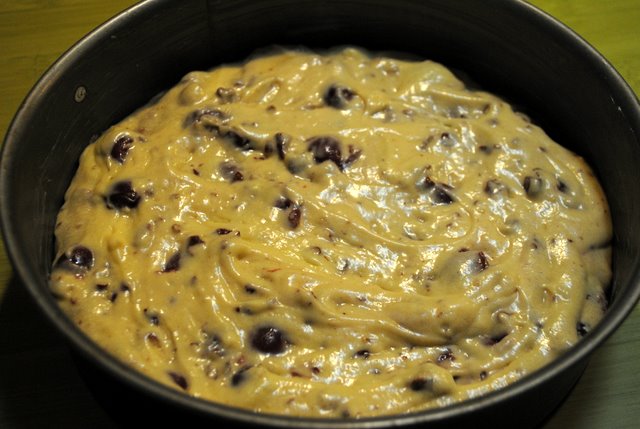
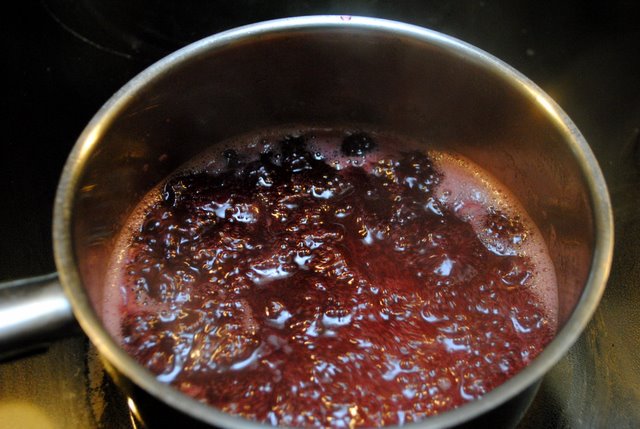
While the cake is baking, make the sauce by combining reserved cherry juice, flour and sugar in a small pot. Boil gently for 8-10 minutes.
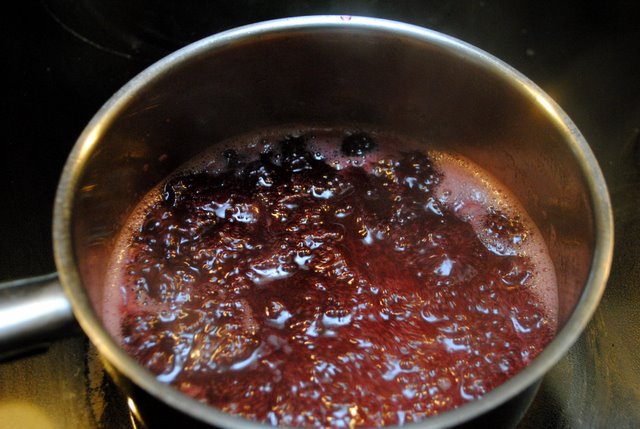
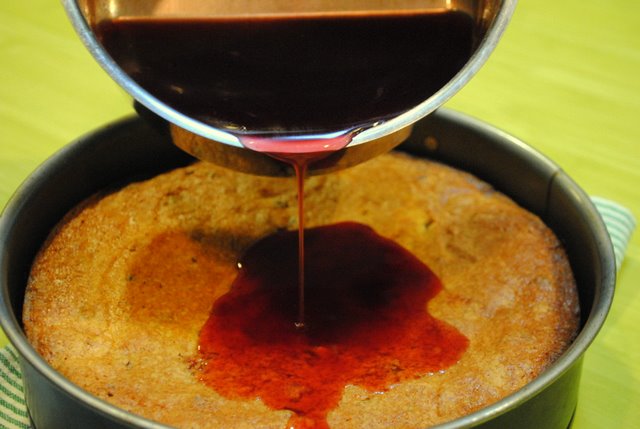
Turn off heat and stir in butter and vanilla. As soon as the cake comes out of the oven, all toasty, golden brown, drizzle at least 1/3 of the sauce over the cake and spread it evenly.
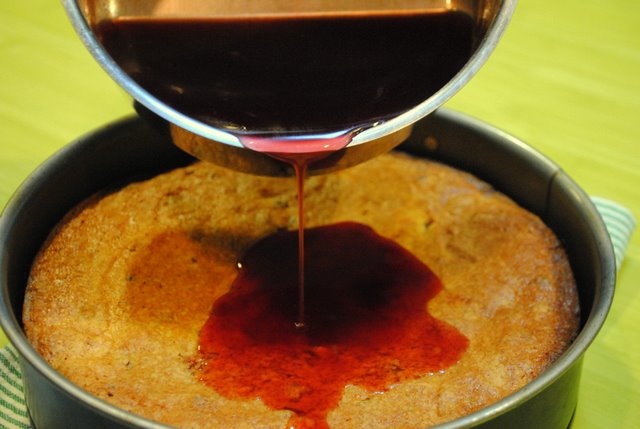
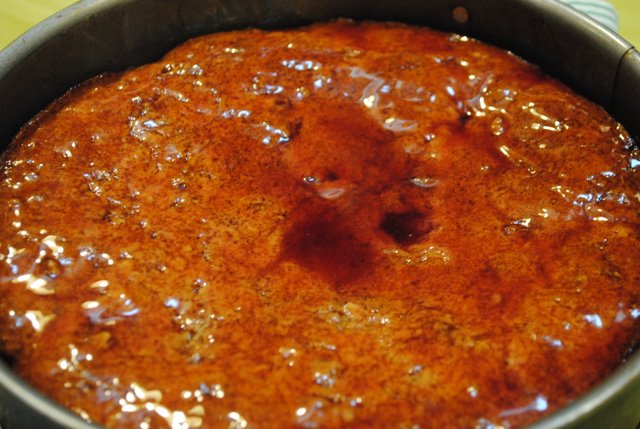
A little of the sauce sneaks into the cake, adding an extra layer of yumminess….the rest creates that ooey, gooey glaze.
Spoon out pieces of the warm, cherry-happy cake onto serving plates, drizzle with more saucey syrup and top with a dollop of unsweetened whipped cream.
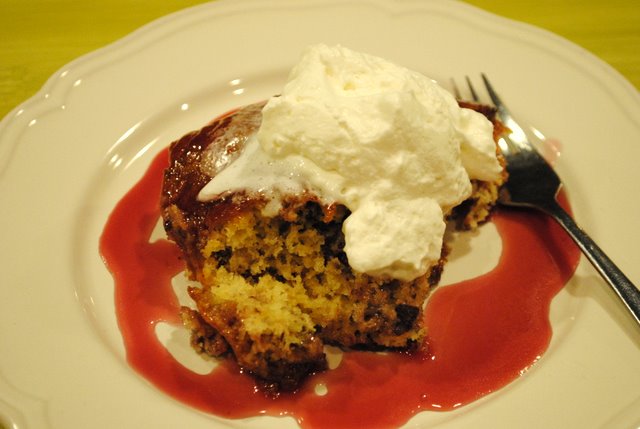
As it turns out, Cherry Pudding Cake is a perfect ending to a chilly-winter-night dinner gathering in the snowy hills of Peachland. I could tell by all the mmmm's. Try it yourself and see how many mmmm's you can get in your neck of the woods……..
CHERRY CAKE PUDDING
1 cup sugar
2 tablespoons butter, softened
1 egg
1 cup flour
1 teaspoon baking powder
1/4 teaspoon salt
1/2 cup whole milk
1 can (15-18 ounces) sour cherries in syrup, drained, juice reserved
1/2 cup walnuts, toasted, chopped
SAUCE:
1 cup reserved juice from cherries (add water to make 1 cup if necessary)
1 cup sugar
1 tablespoon flour
1 tablespoon butter
1/2 teaspoon vanilla or almond extract
Unsweetened freshly whipped cream
Preheat oven to 325F. Generously butter a square 9×9-inch baking dish or 9-inch springform pan. Cream sugar and butter. Add egg and mix well. In another bowl, whisk flour, baking powder and salt then add to mixing bowl alternately with milk. Add cherries and chopped nuts and stir gently to mix. Pour batter into prepared pan and smooth out the surface. Bake for 40-45 minutes, or until golden brown and no longer jiggly.
While cake is baking, make the sauce by combining cherry juice, sugar and flour in a small pot. Boil gently for 8 to 10 minutes, until thickened. Turn off heat and stir in 1 tablespoon butter and the vanilla or almond extract.
Drizzle 1/3 of the sauce on the cake as soon as it comes out of the oven. Spread to distribute over the surface and wait ten minutes before serving so the sauce will seep into the top of the cake a bit.
Spoon out pieces of warm, sticky cake, drizzle with a little more sauce and top with unsweetened whipped cream.
**I made my cake earlier in the day, then just reheated in a 300F degree oven for about 10 minutes before serving.**
by TheLastWonton | Jan 8, 2011 | Baking & Desserts, Sauces, Dips & Condiments
CREAMY SMOOTH, CHEWY, CHOCOLATEY FUDGE SAUCE THAT'S EVEN BETTER THAN THOSE CHILDHOOD MEMORIES OF THE YUMMIEST HOT FUDGE SUNDAES IN THE WHOLE WIDE WORLD
No kidding!!!
This is seriously the last Hot Fudge Sauce recipe you will ever need.
It's what you've been looking for. I just know it!
I think all us foodies want that perfect hot fudge sauce that sweeps us back to when we were kids. Remember when a hot fudge sundae was as close to heaven as we could get? And in those days, the hot fudge always had real chocolate, cream and butter in it and when it was poured warm over vanilla ice cream it magically transformed to the yummiest chewy candy ever. Ever!
In my little girl hot fudge memories, I'm sitting on a curb on a hot summer day with a friend on either side of me. We're collectively abuzz in excited anticipation and our delicious good fortune. In that easy childlike abandon, after each mouthful we all throw back our heads, giggling and mmmmm-ing, not able to contain our yummy mirth. Man life was good when we got to break bread of hot fudge sundae proportions with our bestest friends ever.
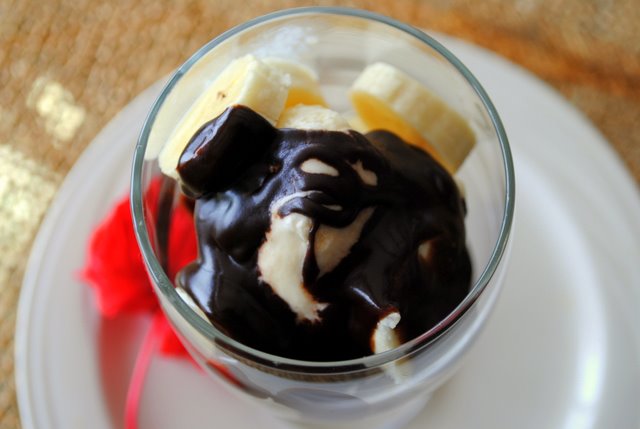
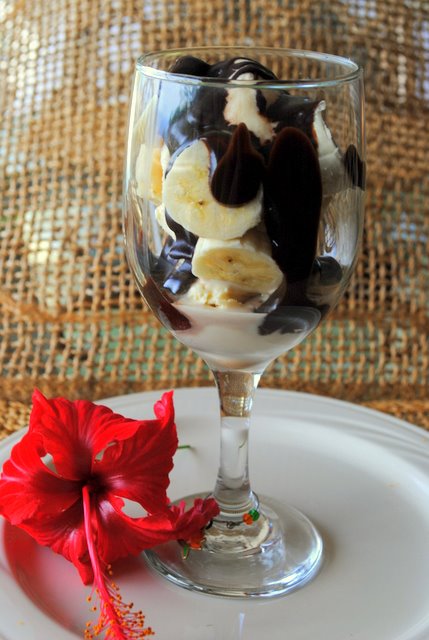
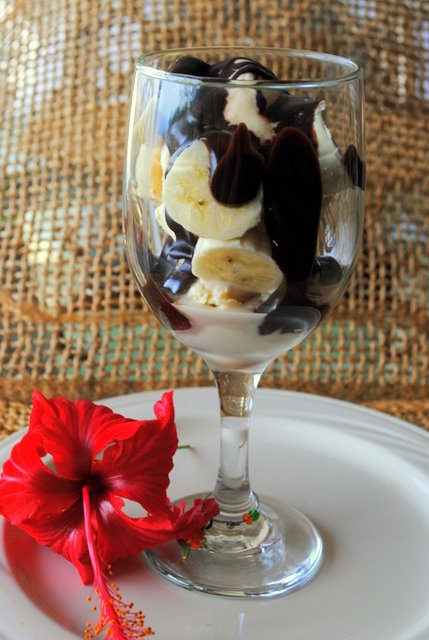
Let me tell you a little something about this particular thick, chewy, fudgy sauce…….old, young or in between, close friends or new acquaintances, it's a rare occasion that anyone will pass on the dessert offering of a Hot Fudge Sundae. And you've got it made in the shade with this recipe because it's a breeze to make and you can have it ready ahead of time. Just warm it up and drizzle it over vanilla ice cream for your family or dress it up in a stemmed glass with specialty ice cream and fruit for a dinner party. Whatever you do, people will tell you, 'this is the best hot fudge sauce I've ever had!' Fun, huh?!
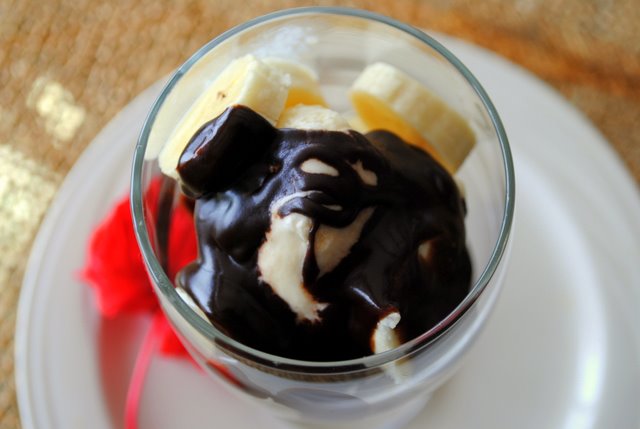
Right now, we happen to still be happily relaxing in our little vacation cottage nestled into an overgrown, jungley, tropical garden on the slopes of Mt. Hualalai above beautiful Kona on the Big Island, so the other night I made Hot Fudge Sundaes with slices of custardy apple bananas and island-made vanilla ice cream. That worked!!
We had leftover hot fudge sauce, so I wasn't quite done playing yet. Lucky me!
Especially being here in Hawaii and all.
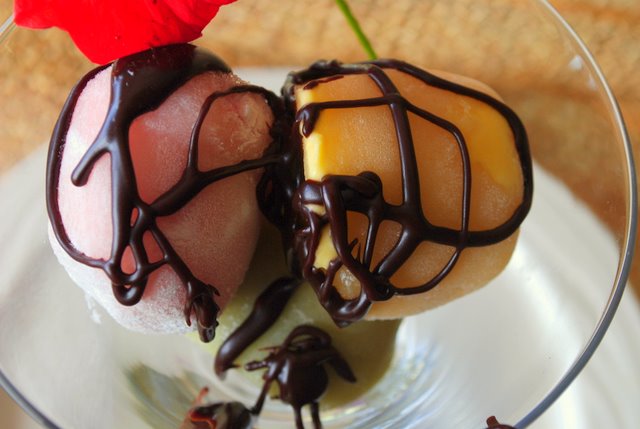
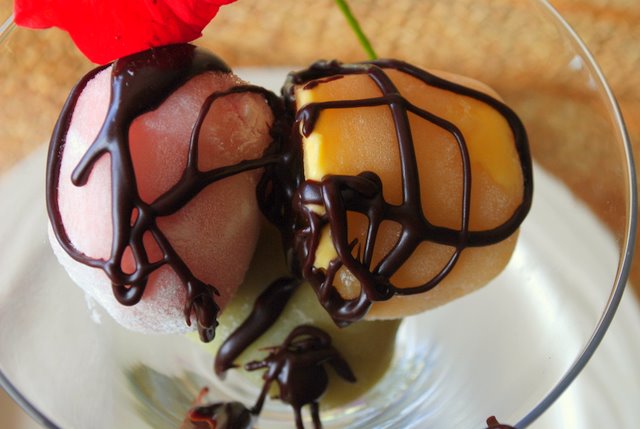
So I got some rather scrumptious mango, green tea and strawberry mochi ice cream balls.
What are mochi ice cream balls, you ask.
Well I say, little balls of happiness. But the package that these particular mochi balls came in says, "A delightful East meets West frozen dessert. Bite-size pockets of all natural ice cream carefully veiled in silky-chewy smooth Japanese mochi rice cake".
Yum-o! Now you can see why I wanted to play around with hot fudge sauce a little more. Who wouldn't, right?
I double dog dare you see how many delicious dessert creations you can make using this scrumptious Old Fashioned Hot Fudge Sauce. Keep me posted!
OLD FASHIONED HOT FUDGE SAUCE
3/4 cup whipping cream
1/2 cup corn syrup
1/3 cup brown sugar
1/3 cup good quality unsweetened cocoa
Good pinch of sea or Kosher salt
1 1/3 cups good quality semi-sweet chocolate, finely chopped (chocolate chips work too!)
2 tablespoons butter
1 1/2 teaspoons pure vanilla extract
In a medium-sized, heavy bottomed pot combine whipping cream, corn syrup, brown sugar, cocoa, salt and half of the chopped chocolate. Bring to a gentle boil over medium heat, stirring frequently until chocolate is melted. Reduce heat and let mixture boil gently, stirring frequently, 5 minutes. Remove from heat. Add butter, vanilla and remaining chocolate. Stir, stir, until gloriously smooth. Let cool a bit before serving, so mixture is warm, not hot. This sauce is always deliciously thick and chewy served over vanilla, coffee, coconut or your favorite ice cream.
Sauce can be made ahead and reheated gently at serving time. Will keep covered in the fridge for about 1 week – if it lasts.
by TheLastWonton | Jan 1, 2011 | Candy, Hawaiian, Holiday & Seasonal, Treats
CREAMY-SWEET, CHEWY LITTLE BITES OF HEAVEN
Once upon a time, a few years back, I belonged to a very special sisterhood. Very special. Back then, when we lived on the Big Island of Hawaii, I crossed over an invisible line that only a rare, few 'outsiders' ever get to traverse.
Somehow or other, all the Hawaiian gods and goddesses were smiling upon me in the same nanosecond of time whilst pushing me with all their legendary might into the blessed, privileged circle of true Hawaiiana.
Hula.
In fact, hula practice, right there in Kona on the hallowed grounds of Hawaiian Royalty, the Hulihe'e Palace.
I was appropriately self-conscious and terribly afraid they would simply laugh and kindly ask me to leave. But they didn't. Or more precisely, HE didn't. In all fairness I think he probably would have preferred to dismiss this over-eager haole (white person; foreigner) chick, but instead he silently sighed, shugged his shoulders and permitted me to stay. IN THE BACK ROW!
My life changed this day, the day I met Kumu (teacher) Hula Etua Lopes. Etua is a highly revered Kumu Hula and Hawaiian chanter. To this day he is the only Kumu Hula that has the honour and privilege of teaching on the royal grounds of the Hulihe'e Palace.
That's exactly where I, enthusiastically, attended hula practice twice a week for 2-3 years of my life. And Etua was my Kumu Hula!!! Life is good!

KUMU HULA ETUA LOPES
Back then, when I had been in hula for a few months, our first Christmas in paradise rolled around and of course I wanted to gift a little something special to Etua. What could I give him to reflect my overwhelming appreciation, happy gratitude and the holly, jolly spirit of the season?
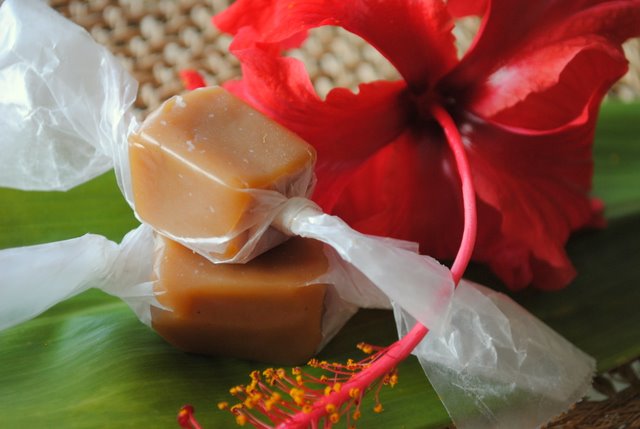
I made him one of the very best things I make. Caramels. He shared his 'best' with me, I had better do no less!
That worked. He loved those caramels! So, so much!! He'd get that mmm, mmmm, mmmmmm satisfied look of sheer pleasure on his face that made me giggle every time. And he still does!
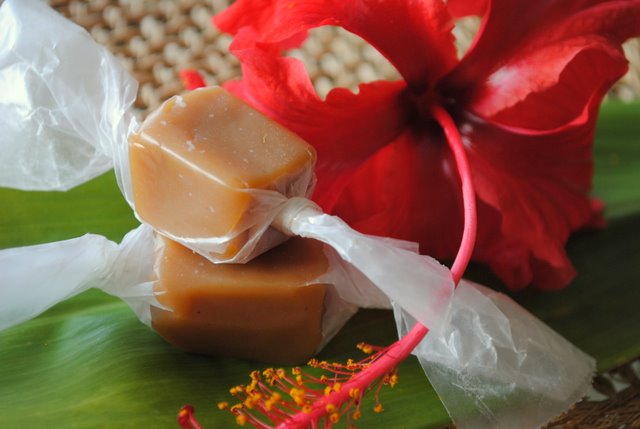
Whenever we come back to the Big Island around Christmas I always come with a big bag of home-made caramels for Etua. Even now, a smile sweeps my heart just picturing his excited grin and eager anticipation when he sees me walking towards him with a overloaded cellophane bag of waxed paper wrapped candy.
Having once been a 'member' of Etua's Hulau Hula Na Pua U'i O Hawaii has given me a secret key of sorts. These days, when I come 'home' to Kona, on any given Tuesday or Thursday, right around dusk, when the Hulihe'e Palace is all closed up for the day I know it's alright for me to go to 'that' particular gate, lift the latch and cross the line back into the inner sanctum of Hawaii. Because once you belong 'they' let you belong forever!
Or maybe it has something to do with my homemade caramels………
Mahalo nui loa Etua for for sharing your authentically Hawaiian talents and teachings with me. My world is a better place because of you.
* * * * * * * * * * * * * * * * * * * * * * * * * * *
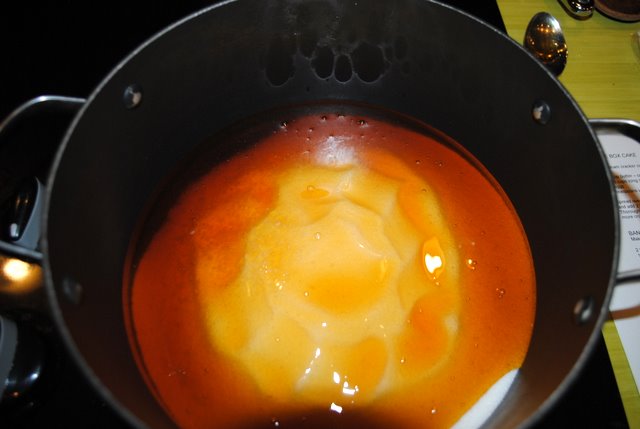
Here we go……………………..Put sugar, salt and corn syrup in a large heavy pot.
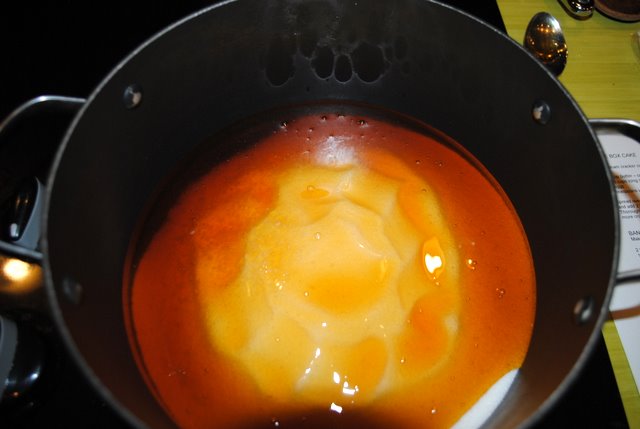
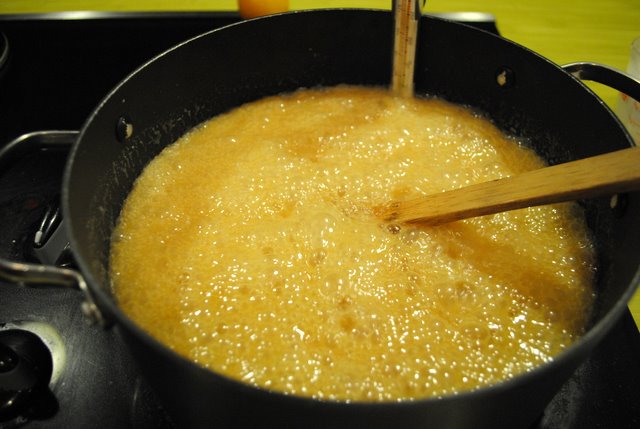
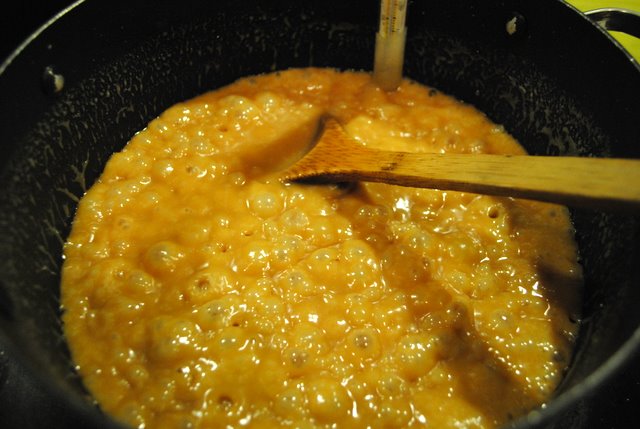
Add 1 cup of the combined creams and cook over medium high heat stirring constantly, until syrup reaches soft ball stage (234F degrees).
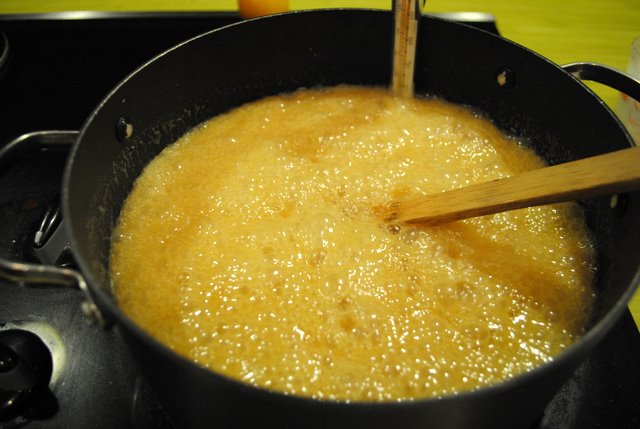
Add 1 more cup of the combined creams and stir until mixture reaches soft ball stage again. Add remaining cream and stir until mixture reaches 245F – 248F degrees. This could take up to about 45 minutes. As the temperature of the candy starts to climb towards the 245F mark, watch carefully and be ready to remove from heat. If you leave the candy past this temperature your caramels will still be amazingly creamy and addictively delicious but they will be hard. We'll looking for soft and chewy here.
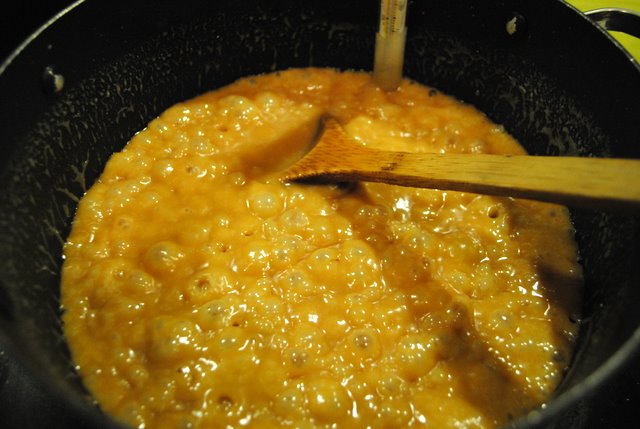
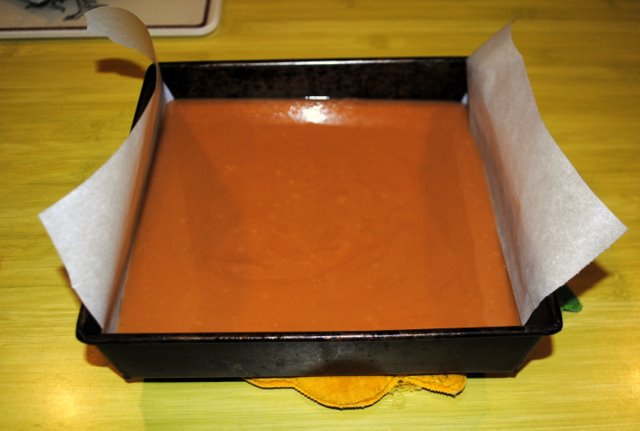
As soon as mixture reaches in the range of 245F – 248F immediately remove from heat, stir in vanilla and nuts if using. Pour into buttered parchment paper lined 8 or 9 inch square pan until just firm but not hard.
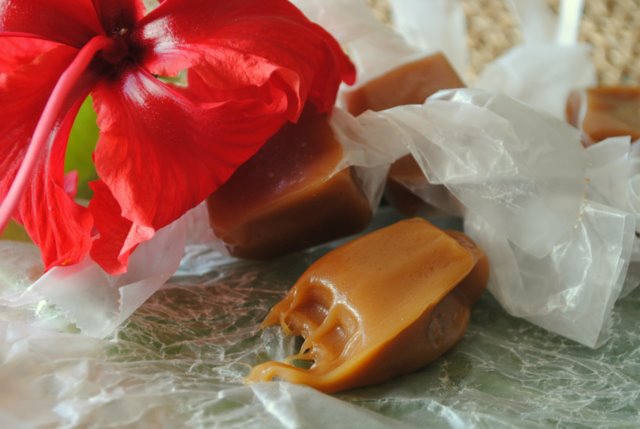
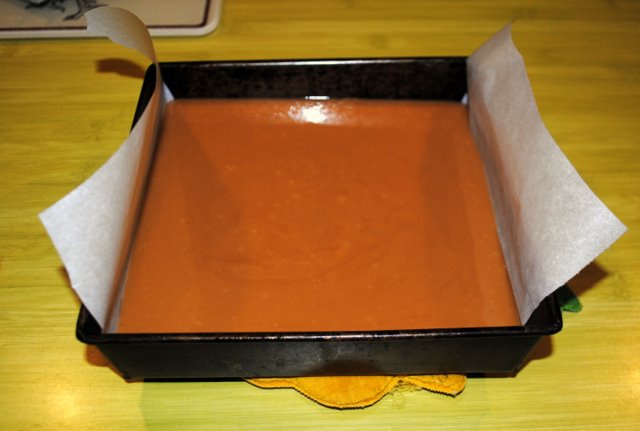 Once caramels have cooled enough, you may want to refrigerate until just firm enough (but not hard) to cut into little squares. Cut into pieces about 1-inch square with a buttered cleaver or butchers knife and wrap in waxed paper squares, twisting the ends. Store in baggies or airtight containers. Makes 80-100 small chewy, scrumptious candies.
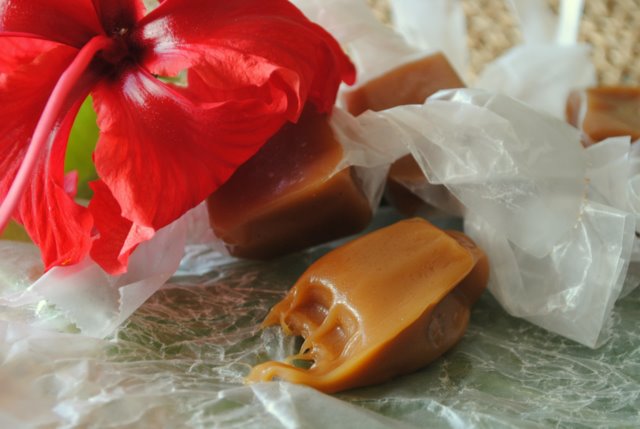
KUMU CARAMELS
1 1/2 cups half-and-half
1 1/2 cups whipping cream
2 cups sugar
1/2 teaspoon Hawaiian, Kosher or sea salt
1 1/3 cups light corn syrup
2 teaspoons good vanilla extract
Optional – 1 cup chopped toasted walnuts, pecans or macadamia nuts
Line a 8 or 9-inch square pan with buttered parchment paper, with some overhang so you can easily remove the caramel 'block' from the pan for easy cutting. Combine half-and-half and cream in a 4-cup measure. Mix sugar, salt, corn syrup and 1 cup of the combined creams in heavy 3 or 4 quart pot. Cook over medium-high heat, stirring constantly, until syrup reaches 234F degrees on a candy thermometer (soft ball stage). Add 1 more cup of the creams and stir until mixture again reaches 234F degrees. Add remaining cream (told you they are creamy!) and stir until mixture just reaches 245F – 248F degrees; this could take up to 45 minutes. Watch carefully and immediately remove from heat when candy is in this temperature range. Stir in vanilla and nuts, if using. Pour into prepared pan and once cooled, refrigerate until just firm, but not hard. (May not need refrigeration to get just firm enough to cut – room temperature might do) Cut into pieces about 1-inch square and wrap in waxed paper. Caramels keep well in air-tight container.