by TheLastWonton | Oct 26, 2010 | Baking & Desserts, Fruits, Holiday & Seasonal, Treats
Quick. Quick!
Hurry. Hurry!!
Get ’em now!
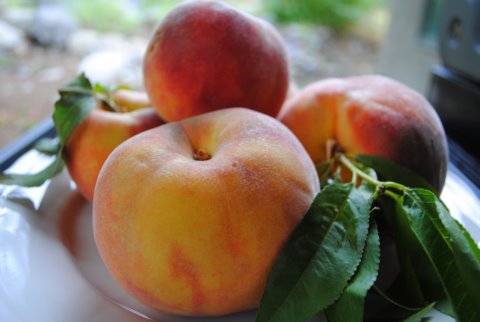
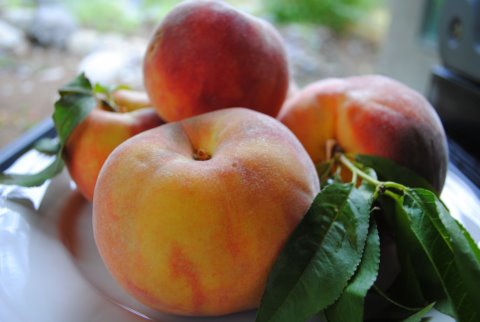
The season is upon us, but it doesn’t last long. PEACH TIME! Local orchards are bursting to share their beautiful, bountifully heavy August crop with us. Woohooo! Okanagan peaches are ripe and ready, ready, freddy to go. I love this time of year!
Getting your hands on that first peach of the season is unforgettable, always. No ceremony needed, just peel that baby as fast as possible and gobble it – at the beach, in the yard, over the sink…… those sweet juices run down your chin and arms, it’s messy but there’s no better rite of passage into peach season.
Now, with that fresh-picked fix out of the way, it’s time to ponder other peachy possibilities……..jam, crisp, pie, upside-down cake, pavlova, strudel. So naturally I plunk down at my computer and head off to the food blogs in search of something peachy keen. Ah ha! It didn’t take me long to find exactly what I was looking for.
Dawn at First Look Then Cook food blog borrowed a recipe from Cooking Light that made me do that sideways glance at the peaches on my counter, now knowing exactly what was in store for them.
Are you kidding me? How absurdly delicious does this sound, “Oatmeal Cookie Peach Cobbler”? As if fresh picked peaches aren’t the prize themselves, I’m going to throw warm-from-the-oven oatmeal cookies into the mix and schmuck the two together. Mwah!
YUMMY! Dawn is right, the cookie-top gets all toasty brown and crispy crunchy, but underneath where cookie meets peaches, it’s soft and chewy. You know you WAAAHNNT it!
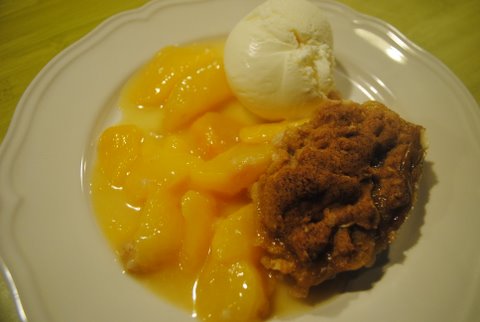
I stayed pretty darn true to First Look Then Cook’s recipe (just a couple of eensy changes). It’s a keeper. Try it and see what you think. Be sure to serve your Cookie-Top Peach Cobbler warm, with a scoop of good vanilla ice cream, and I bet everyone will lick their plates just like they did at my house.
I’m so glad I live in Peachland.
* * * * * * * * * * * * * * * * * * * *
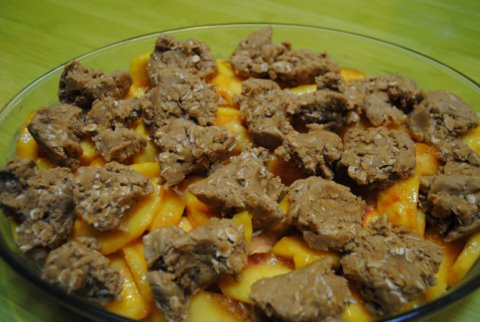
Here we go………………..Make your cookie topping first because it has to chill for 30 minutes or so. Then peel and slice those juicy, fresh peaches and toss with the sugar, flour and lemon juice. When I was tossing the peaches with this mixture I thought it might be good to add a tablespoon or two of quick-cooking tapioca instead of the flour. I didn’t do it, but next time, it’s out with the flour and in with the tapioca. Dollop mounds of cookie dough evenly over top of the peaches.
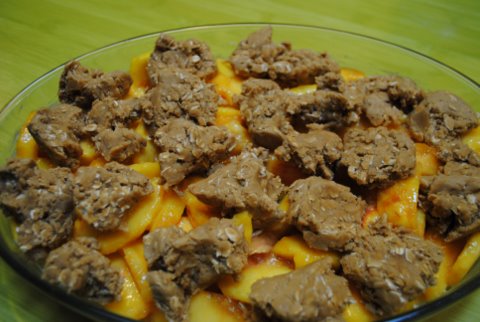
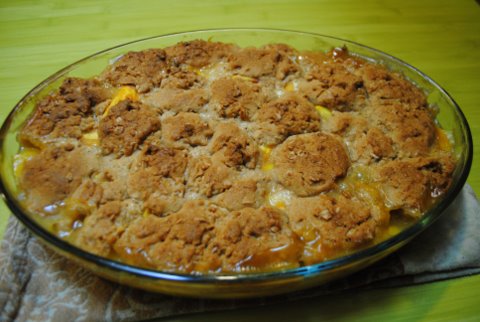
Bake at 350F for 40-50 minutes.
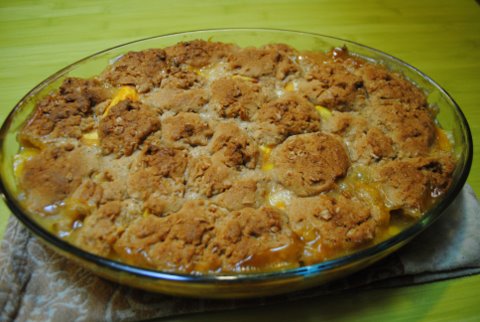
Serve it up warm with vanilla ice cream. Yum-O!
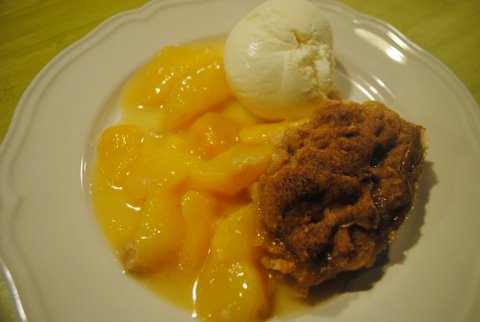
COOKIE-TOP PEACH COBBLER
Topping:
1/2 cup granulated sugar
1/2 cup packed brown sugar
1/2 cup butter, softened
2 teaspoons vanilla extract
1 large egg
1 cup flour
1 cup old-fashioned rolled oats
3/4 teaspoon baking powder
1/2 teaspoon salt
Filling:
12 cups sliced, peeled peaches (about 5 pounds)
1/3 cup sugar
2-3 tablespoons flour (or minute tapioca)
2 tablespoons fresh lemon juice
Butter for baking dish
For topping, combine sugars and butter in large bowl of electric mixer and beat at medium speed until well combined. Add vanilla and egg and beat until light and fluffy. Combine flour, oats, baking powder, and salt in another bowl and stir with a whisk. Add flour mixture to sugar mixture; beat at low speed until blended. Cover and chill 30 minutes.
Preheat oven to 350F. For filling, combine peaches, sugar, flour and fresh lemon juice in a bowl; toss to coat. Transer peaches to a 13 x 9–inch baking dish (or similar sized oval baking dish) coated with a bit of butter. Dollop about 20 mounds of chilled dough over peach mixture at even intervals. Bake at 350° for 40-50 minutes or until lightly browned and bubbly and gorgeously fragrant. Serve warm with vanilla ice cream.
HOME
by TheLastWonton | Oct 26, 2010 | Baking & Desserts, Holiday & Seasonal, Treats
It was one of those chilly, drizzley, the-sky-has-fallen autumn days. The wet, grey skies somehow had a way of transforming the golden leaves on the birch, that line our backyard creek, into little, eye-popping brilliant yellow florescent signs, heralding the end is near. Foggy mists played tag between the forest trees and clung to near-by mountain slopes.
If I was going to concoct in the kitchen today it better be something as outspoken as this postcard of an autumn day. It was!
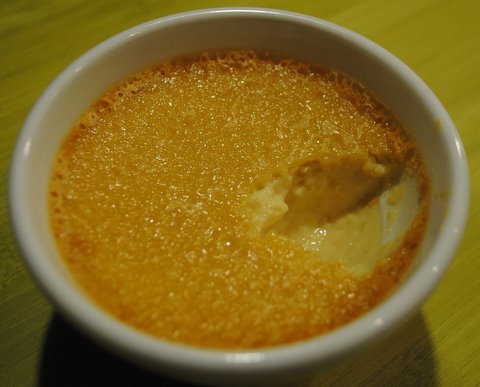
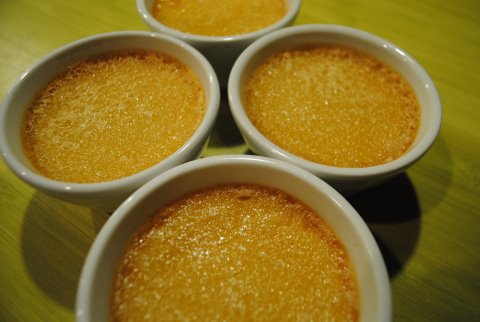
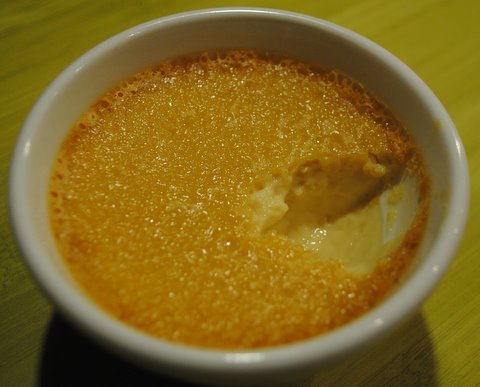
These Maple Pot de Creme are incredible. Impossibly smooth and creamy, and the purity of the maple soothes your tastebuds the moment it hits your mouth. Sweet, glorious texture, flavour and richness all wrapped up in one beautiful little easy-to-make dessert. Perfect for a fall dinner party or if you're like us, just because it's Sunday.
I owe a big, warm thank-you to Elissa and her wonderful food blog 17 and Baking. I've already lined up another couple of recipes of Elissa's I'm going to have to try my hand at. Really soon! Especially if these Maple Pot de Creme are any indication of what's to come.
My husband, Cliff, 'mmmm-d' with every single taste-testing mouthful before scraping the bowl clean and asking if he could pretty please have another one. Yes, they are that good.
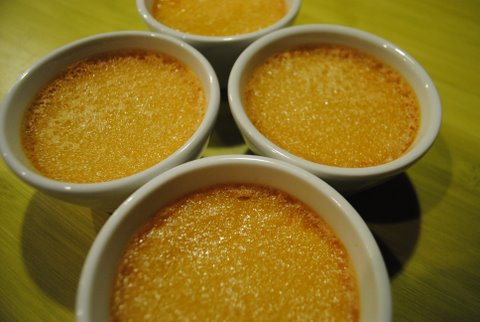
MAPLE POT DE CREME
Makes 4 servings
1 1/2 cups heavy cream
1/2 cup pure maple syrup
1/2 teaspoon sea or Kosher salt
4 large egg yolks
1 teaspoon pure vanilla extract
Preheat oven to 300F and arrange four ramekins or custard dishes in a rimmed baking dish.
Combine the cream, maple syrup and salt in a small pot. Heat until it comes to a simmer. In a medium bowl, whisk together the egg yolks and vanilla extract. Using a small ladle, add some hot cream to the egg yolks a few tablespoons at a time. Then whisk the egg yolks into the cream in the pot until combined. Strain the mixture through a fine sieve. (I skipped this step and still ended up with velvety smooth custard)
Pour the mixture into the four ramekins. Carefully pour enough hot water into the rimmed baking dish to come halfway up the sides of the ramekins. Bake until the edges are set but the centre just gently jiggles when shook, about 55-65 minutes. Remove the ramekins from the water bath and cool to room temperature. Eat, or cover each ramekin with plastic wrap and keep in the fridge.
**Cliff didn't care if he ate these babies warm or chilled, just as long as he could have another one. I, like Elissa from 17 and Baking, preferred them cold. The chilling seems to kick up the gorgeous texture and who doesn't like that?**

by TheLastWonton | Oct 23, 2010 | Candy, Holiday & Seasonal, Treats
Possibly the best fudge in the world. Seriously!!! I'm not just whistling Dixie. This is candy heaven.
Creamy, velvety smooth sweetness interrupted only by the crunch of fresh-picked walnuts. (oven toasted to intensify the crisp nuttiness)
Not only is this the best tasting fudge, there's all those other elements that come into play.
Fudge screams old-fashioned, home sweet home to us. Definitively so.
Nostalgia in every bite. Who doesn't remember watching as your Mom drip-dropped molten sugary syrup, off the wooden spoon, into a measuring cup of ice-cold water to test if the fudge was ready yet? Watching and wondering if you'd get to savour that little ball of almost-fudge or if your Mom had to taste it to 'make sure'.
For me, and I think I can speak for you too, fudge remains high up on the ultimate treat list to this day. But it's got to be homemade. And it's got to be worth every damn calorie!!
Over the years I've found some amazingly good fudge recipes. Some remained my old standbys that I would make every Christmas for quite a few years. But it wasn't until just before Christmas last year that I hit fudge paydirt. Oh yes!
Last Christmas I was on a mission to make-the-best-in-the-world cookies and candies I could. For gifts. My exhaustive search for these knock-your-socks-off recipes reaped the rewards. Boy do I have some fantastic cookie recipes to share with you soon. And some caramels too. Wow caramels!
But, I digress…..back to the fudge, and me scooting about online to find the recipe of recipes. Google, google. Click, click……for hours, days, nights. Then, eureka!! Thibeault's Table - a rather scrumptious food blog out of the Cowichan Valley on Vancouver Island. After just one try, Ann Thibeault's fudge recipes gave me the boasting rights to say, "I make the best fudge in the world".
Ann lists 3 different fudge recipes – Chocolate, Maple Cream and Walnut and White Chocolate. I've made 'em all, I've mixed and combined them a bit. Every single batch of fudge has been to die for. Thanks Ann!
I've only slightly altered this recipe from the original, because after making them all, I knew what I wanted and how to get it.
So here it is. And I will add that EVERYONE that has tried this fudge and the chocolate version of as well – I'll post that soon, I promise – proclaims, "this is the best fudge I've ever had". Cool, eh?
* * * * * * * * * * * * * * * * * * * * * * * * *
Here we go………..you want to roast/toast your walnuts ahead of time – about 10-15 minutes at 325F. just until they're softly golden. I was so lucky this autumn to be gifted one big bag and one big basket of fresh picked Okanagan walnuts. There's nothing like them! Thanks Rob and Garth & Pam!

I like pouring my finished fudge into a double loaf pan instead of the usual oblong or square pan. There's something profoundly wonderful about 'deep' fudge.
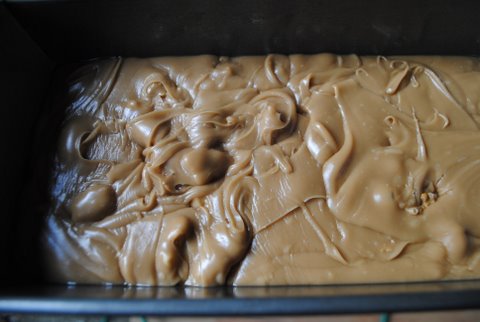
See, I told you!! Deep fudge rocks!
MAPLE WALNUT FUDGE
1 cup sugar
1 cup brown sugar
1 cup whipping cream
1/2 cup butter
1/2 teaspoon sea or Kosher salt
1/4 cup pure maple syrup
1 1/2 cups chopped Callebaut or other good quality white chocolate
1 cup walnuts, roughly chopped and toasted
2 teaspoons vanilla
Add the two sugars, cream, butter, salt and maple syrup to large-ish pot over medium heat. Stir while bringing to a boil. Lower the heat and continue to stir slowly while the mixture cooks. After about 7 minutes, test by pouring a small amount into cold water. You want it to form a soft ball. Or use candy thermometer to 235F – 238F – soft ball stage. When it reaches the soft ball stage remove from heat and let rest for 10 minutes.
After 10-15 minutes add the white chocolate and vanilla and stir until chocolate melts. You will notice the fudge start to thicken immediately. Stir another couple of minutes until the fudge starts to lose it's shine. Quickly add the walnuts and pour into a buttered double loaf pan or dish. Let cool at room temperature. Chill.
Best served chilled. Now you have the best fudge recipe in the world.
by TheLastWonton | Oct 23, 2010 | Appetizers & Snacks, Asian, Beef, Pork & Lamb
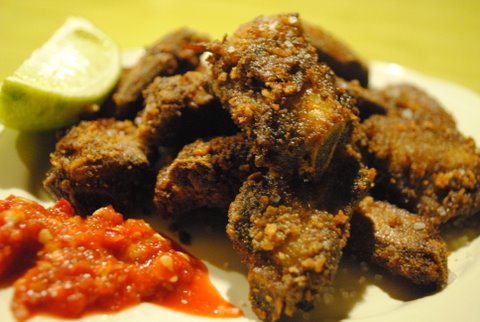
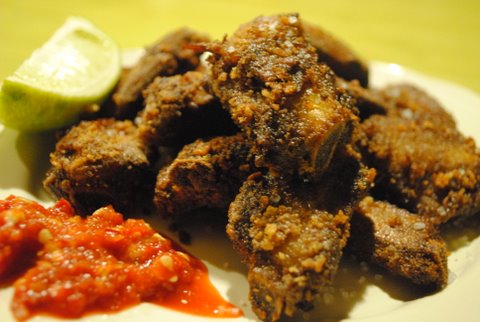
Paradise Valley Happy Pork Emporium. Maybe that's what we should be calling our house every single time we make dry garlic ribs. We just love those tender crispy fried little porkers and so does everybody else who passes our way on the right day.
Yesterday was the right day.
As October's beautiful, colourful autumn days end in chillier and chillier nights, seems our thoughts and cravings are turning towards warm comfort and some of those sinfully delicious foods that do just that.
Now, there's probably not a lot of you out there that consider dry garlic ribs comfort food. That's okay, we'll be patient with you. It won't take long at all for you to jump aboard the I-NEED-SOME-GARLICKY-CRISPY-RIBS-NOW train, once you try these babies.
Sometimes we serve these Dry Garlic Ribs as an appie with cocktails, but last night they were dinner. Dry Garlic Ribs, Jasmine Coconut rice and big bunches of steamed asparagus with just a dab of lime and butter and lots of freshly ground black pepper. Del-i-cious.
DRY GARLIC RIBS
3 pounds sweet & sour cut pork ribs or 2 1/2 pounds well-marbled boneless pork shoulder, cut into 1 1/2 inch cubes
Sea or Kosher salt
1 head garlic, cut in half horizontally
1 tablespoon dry red chile flakes
1 onion, quartered
1/3 cup dark soy sauce
2-3 heaping tablespoons granulated garlic powder
1-2 teaspoons Asian chile paste
1/2 – 1 cup rice flour
*Optional – 1/3 cup panko (Japanese bread crumbs)
Oil for deep frying
Fresh lime wedges
Extra chile paste
In a large pot, cover pork cubes or strips of sweet & sour ribs with cold water. Toss in 1 tablespoon salt, the head of garlic and quartered onion. Bring to a boil over high heat. Reduce heat to med-low, continuing to gently boil for 25 minutes, uncovered. Drain the pork, and put into a large bowl. (If using ribs, cut between the bones into individual riblets, when you remove from pot) While hot toss with soy sauce, granulated garlic and chile paste. Set aside to cool. Marinate at least 1 hour and up to 6 hours.
Heat about 2 inches of oil in fryer, deep pot or wok to 360F. Toss marinated pork with enough rice flour – and panko, if using – to get a dry even coat. When oil is heated, gently slip pieces of pork into hot oil, in batches. Do not crowd meat pieces. Turn with a chopstick to cook pieces evenly, 3-5 minutes or until crispy brown and tender, but not overcooked. Drain on newspaper or paper towels. Sprinkle while hot with sea salt and serve with fresh lime wedges, more hot chile paste and soy sauce for dunking. And beer. Icy cold Sleeman's Cream Ale please. And thank-you.
**You know what else is really good drizzled over these gorgeously crispy tender morsels? Good Okanagan honey (or any honey for that matter!). That silky golden, superbly sweet nectar of buzz paired with the crunchy, salty, spicy bite of pork. Mmmm….mmmm…..mmmm. If you're in the mood for that honey-garlic yin and yang, you're in for a treat. My, oh my, oh my. Happy drizzling.
by TheLastWonton | Oct 2, 2010 | Appetizers & Snacks, Baking & Desserts, Breads & Sandwiches, Breakfast & Brunch, Sides
I love October. Truth be known I think it might just be my favorite month of the year, and contrary to popular belief, the best season to proudly call the Okanagan Valley home. I get absolutely giddy with the beauty that is all around me these days. Beauty so good it hurts. That kind of beauty.
We're lucky enough to live in the forest, so that adds an extra layer of enjoyment. The trees along our backyard creek have been mysteriously painted in an outspoken palette of the prettiest autumn hues I've ever. Magically, when we're looking the other way, a new shade of gold or orange pops out. Squirrels and chipmunks are chattering and scurrying, stocking up for what's coming next. The last of my Green Zebras and other heirloom tomatoes are begging to come in from the garden and be popped into a scrumptiously perfect BLT. And Dad's old bonsais demand my undivided attention every afternoon as they play with light and shadow on the sun-warmed forest floor. A quiet study in the art of nature. Dad would like that.
The rest of the valley is spectacularly beautiful this October too. The lake reflects the surrounding mountains in a crystalline teal blue, row upon row of deep green vineyards boast heavy, auspicious bunches of purple grapes, the bounty of the season spills over from roadside fruit and veggie stands and it seems no matter where you go the air is apple scented. Mmmm.
Hot Indian summer afternoons give way to dusky sunsets that borrow their glow from the autumn leaves until darkness quickly falls and the heavenly clear skies are blanketed in a canopy of twinkling stars that takes your breath away. Not to be outdone by the splendour of a gigantic, pumpkin-tinged harvest moon that can't help but cast soft, warm moonbeams across the hills, mountains, forests and lakes, reminding us that indeed October is here.
And then there's autumn food. Everything about October is beauty and comfort, even our meals. Farm to table meets old fashioned, down-home goodness, with the playfulness of Oktoberfest thrown in for good measure.
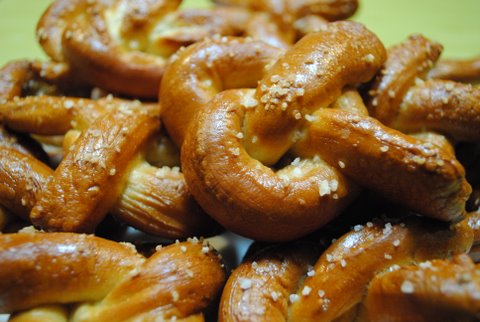
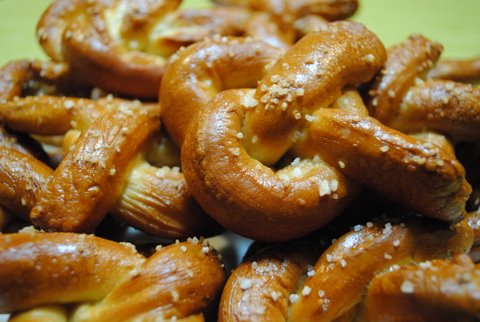
Which brings me to homemade soft pretzels. Chewy, yeasty, addictive. And fun! And pssst………I do the dough in my breadmachine so they're easy peasy too. There's a bit of fiddling with them after that, but I promise you they're more than worth it. And besides that you get to make snakes with the pretzel dough. See I told you they were fun! To make and to eat!! Yum-o!! Wait 'til you try these babies! Bet you can't just make one batch. Have fun and Happy October!
* * * * * * * * * * * * * * * * * * * *
Here we go………………..throw everything into the breadmaker, dry ingredients first and let it do it's thing on the 'dough cycle'. When it beep, beep, beeps, turn the dough out onto a lightly floured surface and let it rest for about 10 minutes. Then cut it in half and roll each half into a rectangle. Cut each rectangle into 8 strips.
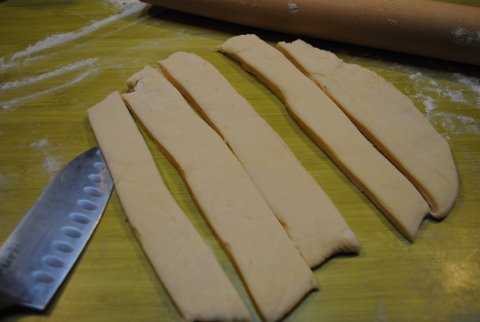
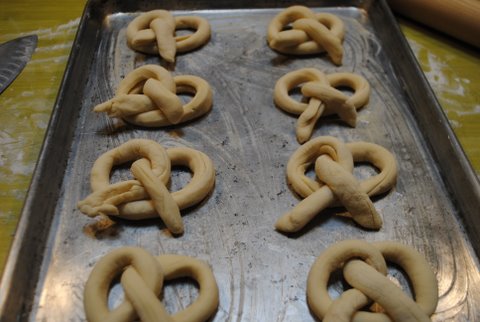
Take each strip and roll it into a snake. Tie your snake in a pretzel shape and set out onto buttered cookie sheet.
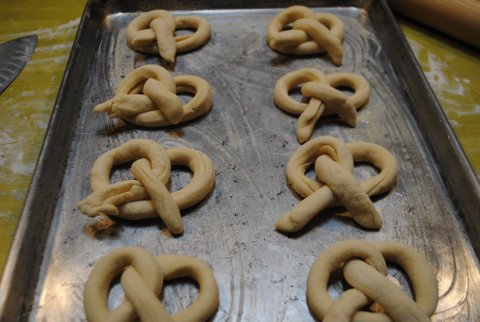
Bake at 475F for about 4 minutes, 'til just starting to brown.
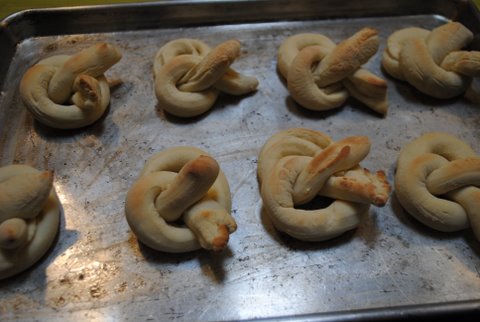
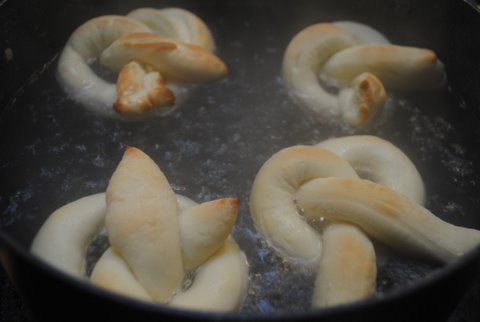
Have salted, baking soda-ed boiling water ready. Pop 4 pretzels at a time into simmering water for 2 minutes – 1 minute per side.
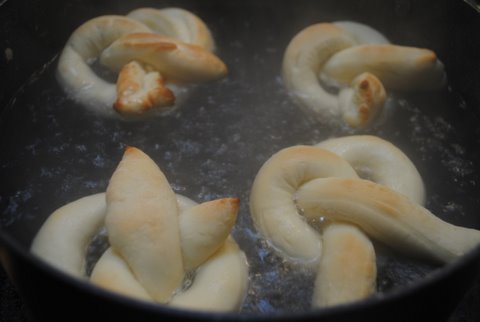
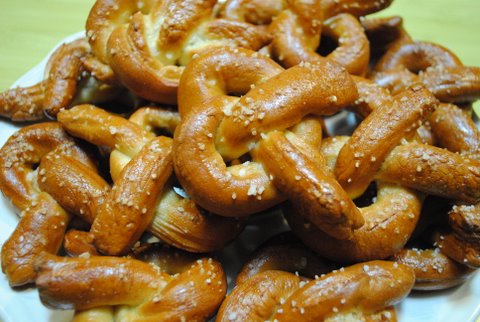
Remove from water, drain briefly on paper towels. Bake on well buttered cookie sheets at 350F for 18-25 minutes. Scrumptious warm from the oven!
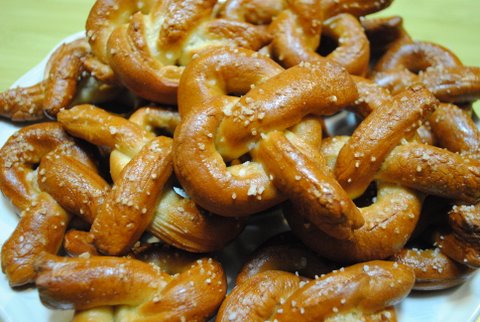
Dig in!! Chewy, yeasty pleasure in every morsel. Great dipped in grainy mustard, tangy cheese sauce made with aged cheddar, honey or stilton butter or just plain old creamery butter. Or – and I cannot help this, I've been lovingly affected by a long line of English cooks – warm pretzel broken open and smeared with lots of butter then drizzled with thick ribbons of cold, luscious golden syrup. Warm and cold, sweet and salty, soft and chewy. MMM…mmmm….mmmm. It's the bees knees!
SOFT CHEWY PRETZELS
3 teaspoons breadmaker yeast (I use 2 tsps. breadmaker yeast + 1 tsp. traditional yeast)
1/4 cup sugar
4 cups flour
1 teaspoon salt (I use Kosher or sea salt)
Just barely over 1 1/2 cups warm milk
3 tablespoons olive oil
Water
1/3 cup baking soda
1 heaping tablespoon salt
1 egg white, beaten together with 1 tablespoon water
Course sea or Kosher salt, sesame seeds or poppy seeds
Add everything to breadmaker, in order given. Set on dough cycle and let it do it's thing. When it beeps, turn dough out onto lightly floured surface and let rest 10 minutes. Meanwhile, grease 2 baking sheets. Preheat oven to 475F.
Cut dough in half. Roll each half into rectangle and cut each half into 8 long strips. Roll each strip into a snake and pull to about 12 inches long. Shape into pretzels and place at least 1-inch apart on prepared baking sheets. Bake, one sheet at a time, for 4 minutes. Reduce oven temperature to 350F.
Meanwhile, dissolve baking soda and heaping tablespoon salt in fairly large pot of boiling water. Reduce heat to keep water at a good simmer and lower 4 pretzels at a time into pot. Simmer 1 minute, flip pretzels over and simmer another minute. Carefully remove with slotted spoon and drain briefly on paper towels. Don't leave them too long, or they'll stick.
Generously grease same baking sheets and place boiled pretzels 1-inch apart on sheets. Brush pretzels with egg white-water mixture and sprinkle with salt or seeds. Bake for 18-25 minutes until dark golden brown. Transfer to cooling rack at least 5 minutes before munching. Great as a snack or served alongside, soup, stew, spaghetti or dipped in soft boiled eggs for brekky. Makes 16.